
Knowledge Base · Email Setup
How to Set Up Business Email on iPhone and iPad
Your iPhone's Mail app works perfectly with business email from AutoHost. Use the one-tap profile from cPanel, or enter the settings by hand — both take under five minutes.
Method 1: Automatic setup profile (easiest)
- On the iPhone, open Safari and log in to cPanel (or ask your administrator to do this part).
- Email → Email Accounts → Connect Devices next to the mailbox.
- Under Mail Client Automatic Configuration Scripts, tap the iOS / macOS option for IMAP over SSL/TLS.
- Allow the profile download → open Settings → Profile Downloaded → Install, enter your passcode and the mailbox password.
The account appears in Mail with all settings filled in.
Method 2: Manual setup
Step 1: Add a mail account
Settings → Apps → Mail → Mail Accounts → Add Account → Other → Add Mail Account.
(On older iOS: Settings → Mail → Accounts → Add Account → Other.)
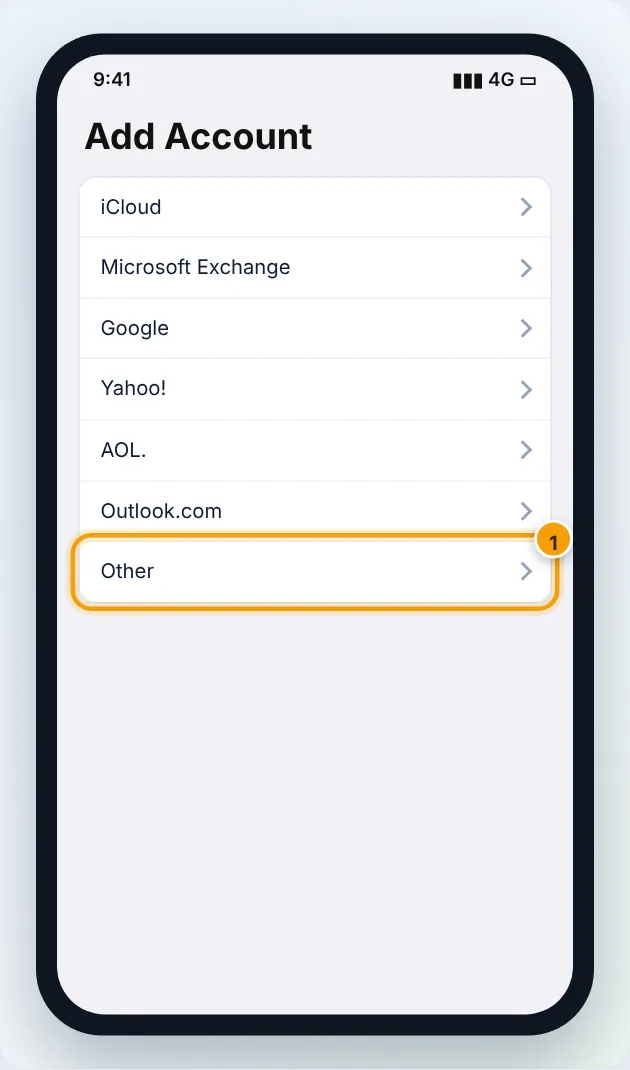
Step 2: Enter your details
- Name: how recipients see you, e.g. Jane — Your Business
- Email:
info@yourbusiness.co.ke - Password: the mailbox password
- Description: e.g. Business Email
Tap Next.
Step 3: Choose IMAP and enter servers
Make sure IMAP is selected at the top, then fill in:
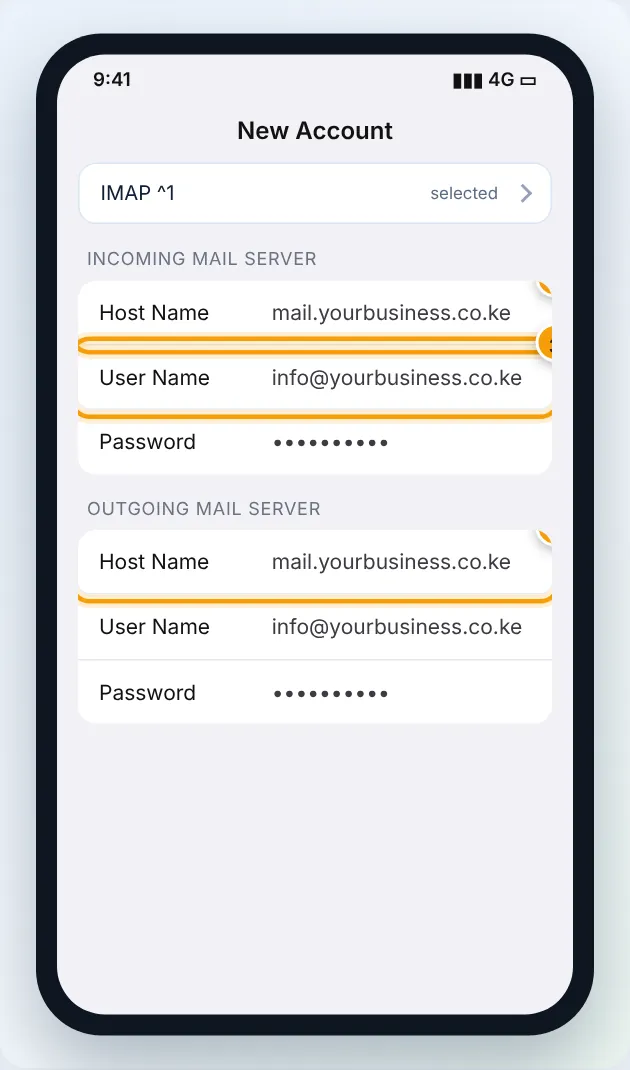
Tap Next. Mail verifies the account (it may take 30 seconds), then Save.
Step 4: Check SSL and ports
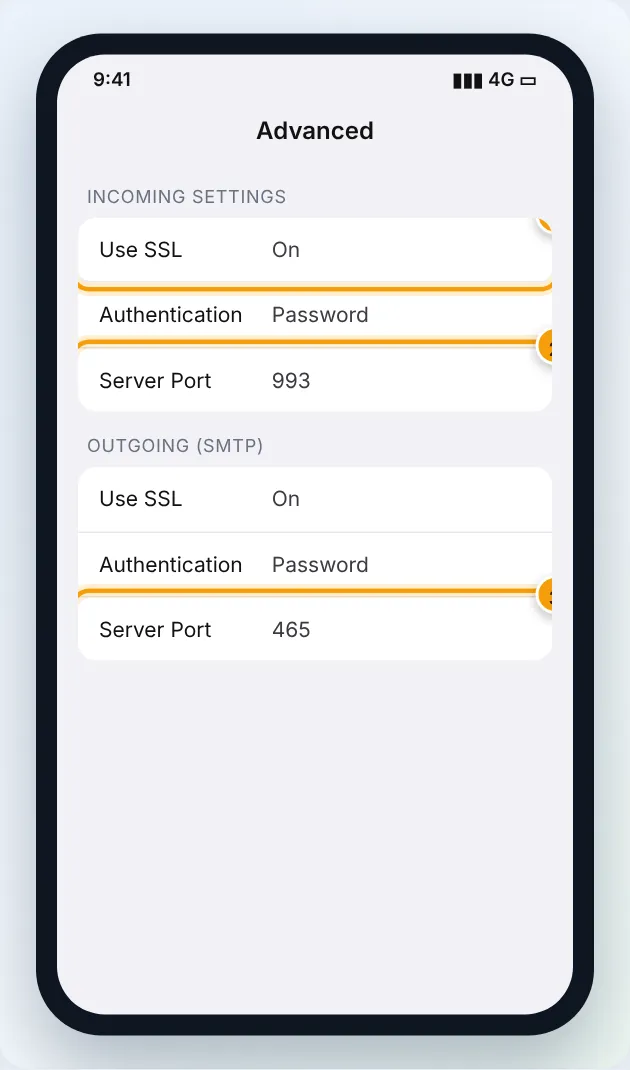
Open the account again: Mail Accounts → your account → Account (top) → Advanced:
- Use SSL: On — Server Port: 993 (incoming)
Then Account → Outgoing Mail Server (SMTP) → mail.yourbusiness.co.ke:
- Use SSL: On — Authentication: Password — Server Port: 465 (or 587)
Test it
Send an email to yourself from another account, then reply from the iPhone. Check the reply appears in Sent in webmail.
Tips
- Fetch New Data: Settings → Mail → Mail Accounts → Fetch New Data → set this account to Fetch every 15 minutes (or Push if available).
- Signature: Settings → Mail → Signature → choose Per Account to add your business signature.
- Default account for new emails: Settings → Mail → Default Account.
Troubleshooting
| iPhone says | Cause | Fix |
|---|---|---|
| “Cannot Get Mail — The user name or password is incorrect” | Wrong password or short username | Use the full address; test in webmail; re-enter in Account |
| “Cannot Send Mail — the server rejected” | SMTP authentication off or wrong port | SMTP: Authentication Password, port 465 SSL |
| “Cannot Verify Server Identity” | Server name not on the certificate | Use the server hostname from cPanel Connect Devices |
| Account added but no folders (Sent/Trash) | Mailbox behaviours not mapped | Account → Advanced → Mailbox Behaviors → map Sent/Trash to server folders |
| Mail stopped after password change | Old password saved | Account → Password → update |
Figures are simplified illustrations. Your screen may look slightly different depending on your theme and the version of cPanel or the app you use.
Still need help?
Our Kenyan support team is on WhatsApp — real people, not bots. Mon–Sat, 8am–10pm EAT. Tickets are open 24/7.